Hey there! I’m a supplier of WPC wall panels, and I often get asked how to attach these panels to the wall. So, I thought I’d put together this blog post to share some tips and tricks on the process. WPC WALL PANELS
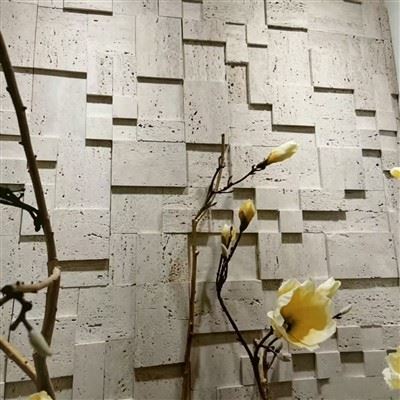
Why Choose WPC Wall Panels?
Before we dive into the installation process, let me quickly talk about why WPC wall panels are a great choice. WPC stands for Wood – Plastic Composite. These panels combine the best of both worlds: the natural look and feel of wood with the durability and low – maintenance of plastic. They’re resistant to moisture, rot, and pests, making them ideal for both indoor and outdoor use. Plus, they come in a variety of styles and colors, so you can easily find one that fits your decor.
Tools and Materials You’ll Need
First off, you gotta gather the right tools and materials. Here’s a list of what you’ll need:
- WPC wall panels: Of course, you need the panels themselves. Make sure you’ve got enough to cover the area you’re working on, plus a few extras in case of mistakes or damage.
- Measuring tape: To measure the wall and the panels accurately.
- Carpenter’s square: This helps you ensure that everything is square and straight during installation.
- Circular saw or miter saw: Depending on the shape and size you need to cut the panels, one of these saws will come in handy.
- Nail gun or screws: You can use either a nail gun to attach the panels with nails or screws and a drill. Nails are usually quicker, but screws offer more secure fixing, especially in areas with high humidity.
- Level: To make sure the panels are installed straight and level.
- Construction adhesive: This can be used to provide extra support and a more secure bond between the panel and the wall.
- Caulk: For sealing any gaps between the panels and around the edges to give a finished look.
Preparing the Wall
Now that you’ve got all your tools and materials ready, it’s time to prep the wall.
- Clean the wall: Remove any dirt, dust, grease, or old paint from the wall surface. A clean wall will ensure better adhesion of the panels. You can use a mild detergent and a scrub brush, then rinse thoroughly and let it dry completely.
- Check for level and straightness: Use a level to check if the wall is straight and level. If there are any significant uneven areas on the wall, you might need to use shims or level the wall surface with a plaster or wallboard.
- Mark the studs: If you’re using nails or screws to attach the panels, it’s important to locate the wall studs. You can use a stud finder to mark the location of the studs on the wall. This gives your panels a solid base to attach to.
Installing the WPC Wall Panels
- Start with the bottom row: Cut the first panel to the appropriate length. If you’re using nails, position the panel against the wall, align it with the marked studs, and use the nail gun to drive nails through the panel and into the studs at regular intervals. If you’re using screws, pre – drill holes in the panel and then drive the screws into the studs. Make sure the panel is level as you attach it. You can use a construction adhesive on the back of the panel for extra support, but apply it sparingly.
- Continue with subsequent rows: As you install the next row, butt the panels up against the bottom row. You might need to make small adjustments to ensure a tight fit. It’s a good idea to leave a small expansion gap (about 1/8 – inch) between the panels to allow for expansion and contraction due to temperature and humidity changes.
- Cut panels for corners and edges: When you reach a corner or an edge of the wall, you’ll need to cut the panels to fit. Use a miter saw to make angled cuts for corners. For edges, you can use a circular saw to cut the panel to the right width.
- Install trim pieces: Once all the panels are installed, you can add trim pieces to cover the edges and give a more finished look. Trim pieces can be attached using nails or screws in the same way as the panels.
- Seal the gaps: After the installation is complete, use caulk to seal any gaps between the panels and around the edges. This not only improves the appearance but also helps prevent moisture from seeping in.
Troubleshooting
Sometimes, things might not go as smoothly as planned. Here are some common issues and how to fix them:
- Gaps between panels: If you notice gaps between the panels, you can try adjusting the position of the panels and using a rubber mallet to gently tap them into place. If the gap is too large, you might need to remove the panel and recut it.
- Uneven panels: If a panel is not level, you can loosen the nails or screws slightly and adjust the position using a level. Then, re – tighten the fasteners.
- Difficult cuts: Cutting WPC panels can be a bit tricky. If you’re having trouble getting a clean cut, make sure your saw blade is sharp. You can also try making multiple passes with the saw instead of one deep cut.
Maintenance after Installation
Once the WPC wall panels are installed, they’re relatively low – maintenance. You can clean them with a mild soap and water solution. Avoid using abrasive cleaners as they can scratch the surface of the panels. Regularly check the panels for any signs of damage, such as cracks or loose fasteners, and make repairs as needed.

Well, that’s about it for how to attach WPC wall panels to the wall. I hope this guide has been helpful to you. If you’re thinking about using WPC wall panels for your next project, I’m here to help. We have a wide range of high – quality WPC wall panels that are both stylish and durable. Whether you’re doing a small home renovation or a large commercial project, we’ve got the right panels for you.
Flexible Stone If you have any questions about our products, need more installation advice, or are interested in purchasing our WPC wall panels, feel free to reach out. We’re always happy to have a chat and discuss your requirements. Let’s work together to make your space look amazing!
References
- "Composite Decking and Siding Installation Guide" by the Wood – Plastic Composite Association
- "Home Improvement Handbook" by DIY Experts Inc.
Linyi Haituo New Materials Co., Ltd.
Address: 1116, Building B04, Lushang Center, Liuqing Street, Lanshan District, Linyi City, Shandong Province
E-mail: sales@wenxingbuild.com
WebSite: https://www.haituonewmaterial.com/
